Add a New Menu
Starting to serve brunch? Want to add a late night menu?
Starting to serve brunch? Want to add a late-night menu? Here is how to get started building a new menu.

-
Log in at pos.tableneeds.net, or log into the Table Needs app!
-
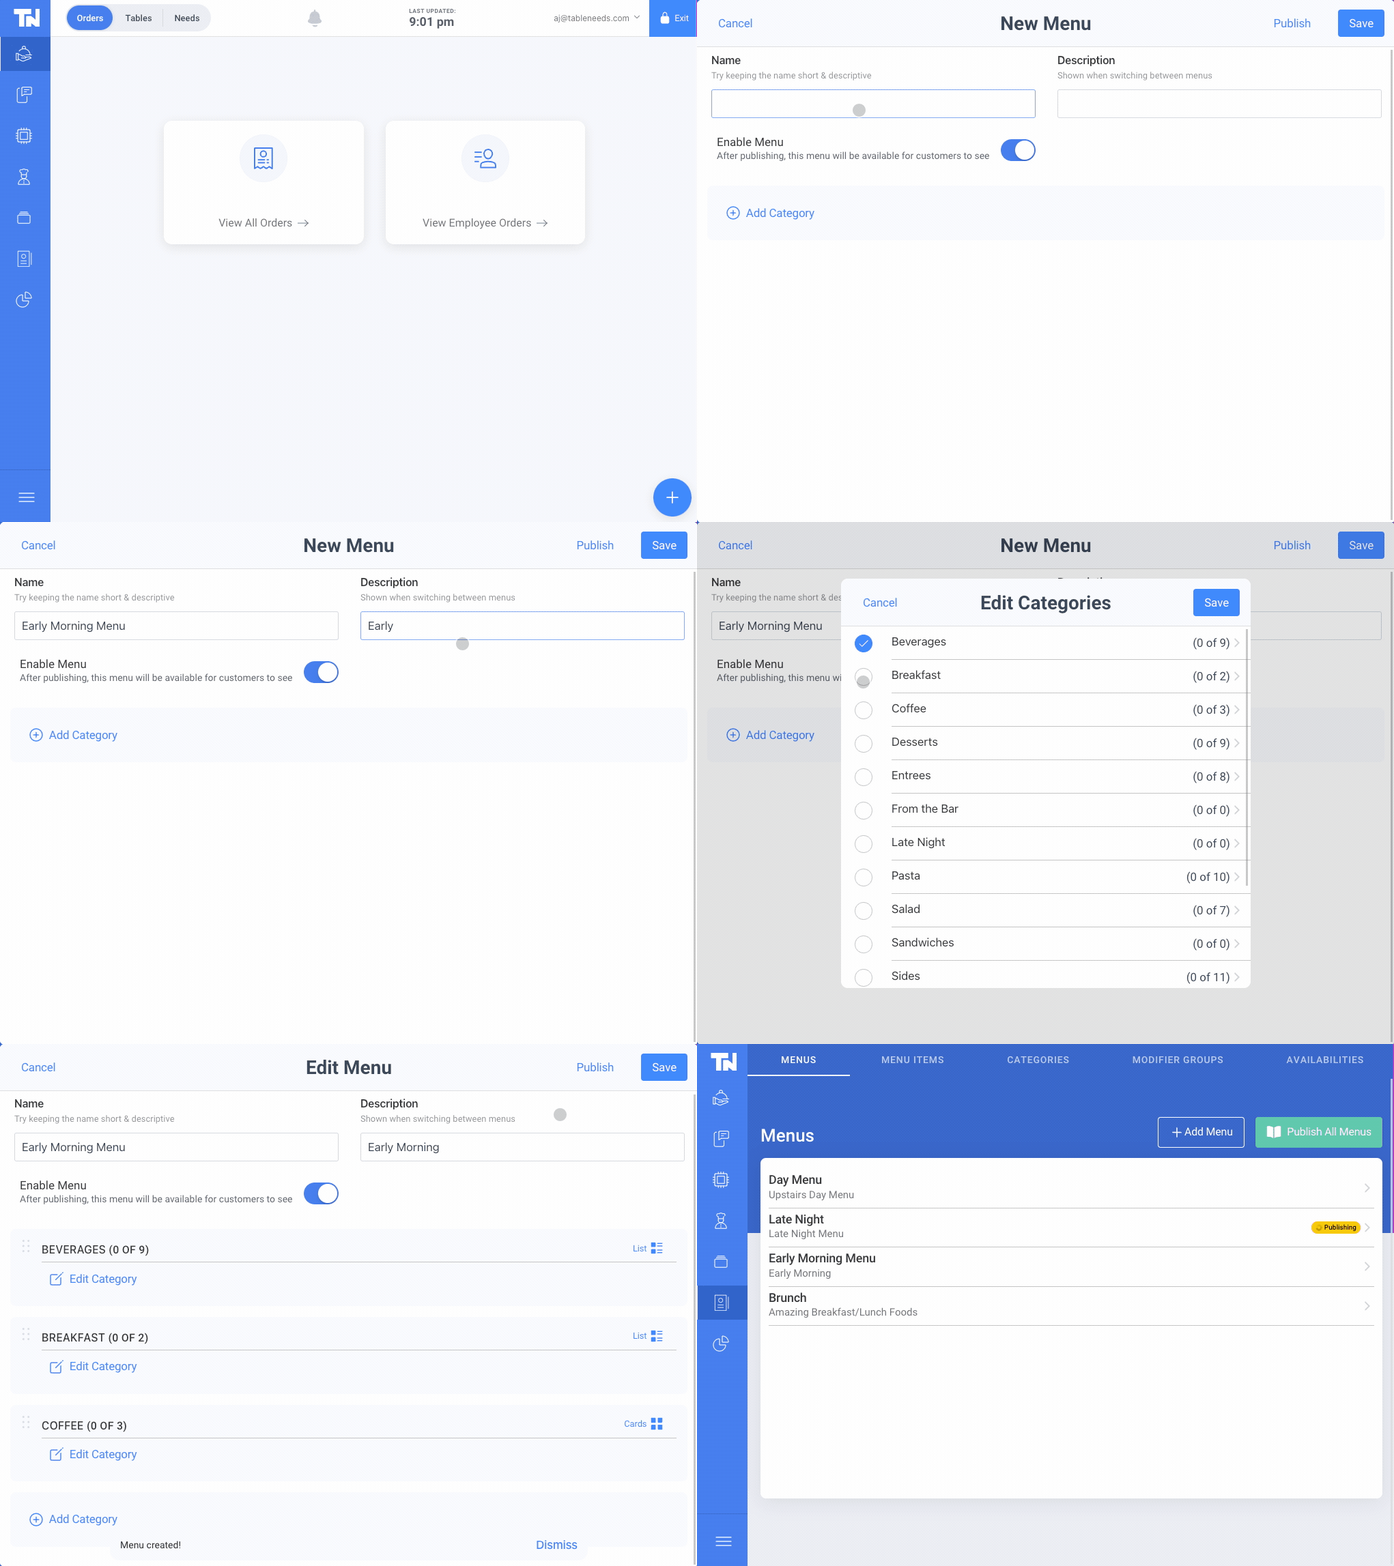
Navigate to the "Restaurant Admin" section, by clicking the "Menu Icon" that's located on the left side of the screen.
-
Click on the "Menus" tab, located at the top of the screen.
-
Click the "+ Add A Menu" button. A new screen will appear, that allows you to Name your menu and apply categories!
-
Type in the desired name of your new menu and a brief description.
-
Just below the naming fields, there is a "toggle switch". Flipping this switch will determine whether or not your new menu will be available to customers upon publishing.
-
Next, you will need to add "Categories" to your new menu along with items. To do so, click on the "Add Category" button. A popup will appear with all of your current categories. Click on the circle to the left of the categories you would like to select.
-
If you only want to display certain items from a category, click on the "arrow" > icon to the right of the category. Now all items within that category will be displayed, and you can select specific Menu Items.
-
When you're done selecting Categories, click on the blue "Save" button located at the top of the pop-up. You will be directed back to the main, edit menu page. From here, you can either Save the new menu or choose to publish it right away! Both are available through the buttons at the top right of the screen.