
Add modifiers and add-on options for menu items
Once you have Created Your Modifiers, it is time to apply them to your menu items. You can learn how in the steps below!
-
Log in at pos.tableneeds.net, or log into the Table Needs app!
-
Navigate to the "Menu Admin" section, by clicking the "Menu" icon that's located on the left side of the screen.
-
Click on the "Menu Items" tab, located at the top of the screen.
-
Navigate to the desired Menu Item, or click the green "Add Menu Item" button! Whether you are doing this for an existing item, or in the process of creating a new one, the steps are the same!
-
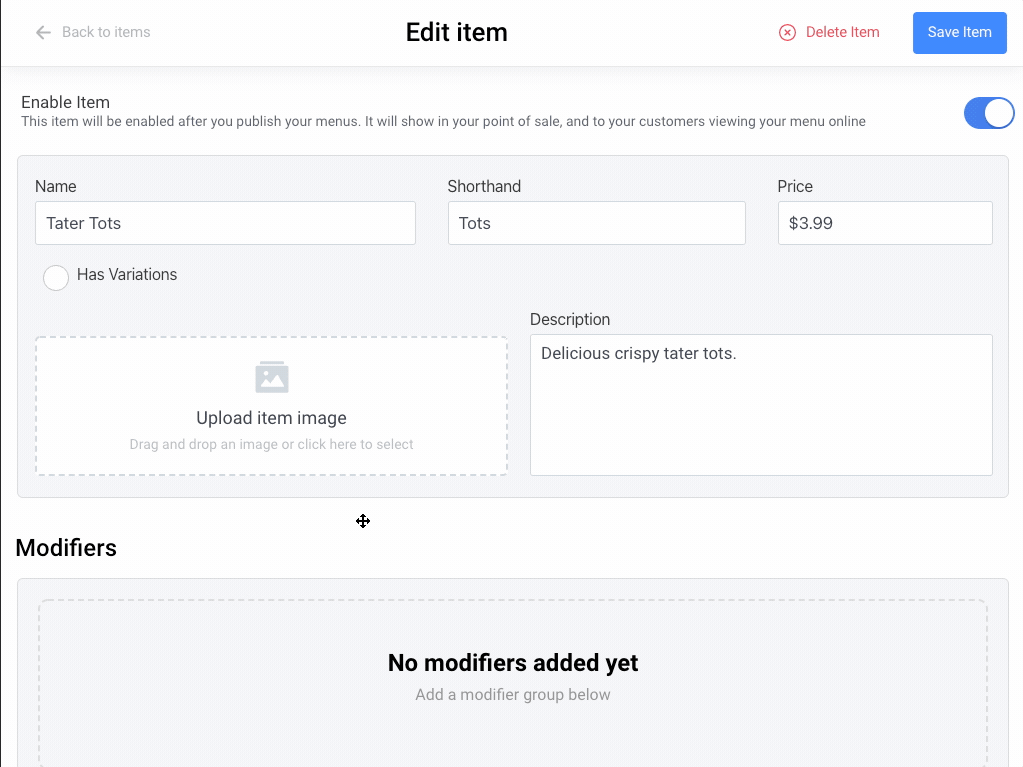
From here, you will be taken to the screen shown in the image below. This page will allow you to change or set all settings related to a Menu Item.
-
Scroll down to the "Modifiers" section of the page and click on "Add Modifier Group".
-
A pop-up will appear, with a list of all current Modifier Groups available. Once a Modifier Group is selected, you will see it displayed within the "Modifiers" section of the Edit Item page.
-
Specify a Minimum and Maximum, for the number of Modifiers that a guest can add to a single item. If there are no limits, you can leave these fields blank!
-
Choose which Modifiers from the "Modifier Group", that you would like applied to the item, by checking the circle to the left of it.
-
Additionally, this section allows you to remove a "Modifier Group" from the item by clicking the red "Remove" button
-
Once you've finished editing an item's Modifiers, click the Save button at the top right of the screen.
-
You will then be taken back to the "Menu Items" page. Make sure to go back to the "Menus" tab and publish your menu! Publishing your menu after making changes, allows your new modifiers to be available for your guests!
To go back and learn how to create modifiers, check out our tutorial here!