Assign where an item is displayed or printed
When submitting orders for your guests, it's crucial to have each of their items printed or displayed in the correct location. Our Menu Manager makes this a painless task! Find out how below!
-
Log in at pos.tableneeds.net, or log into the Table Needs app!
-
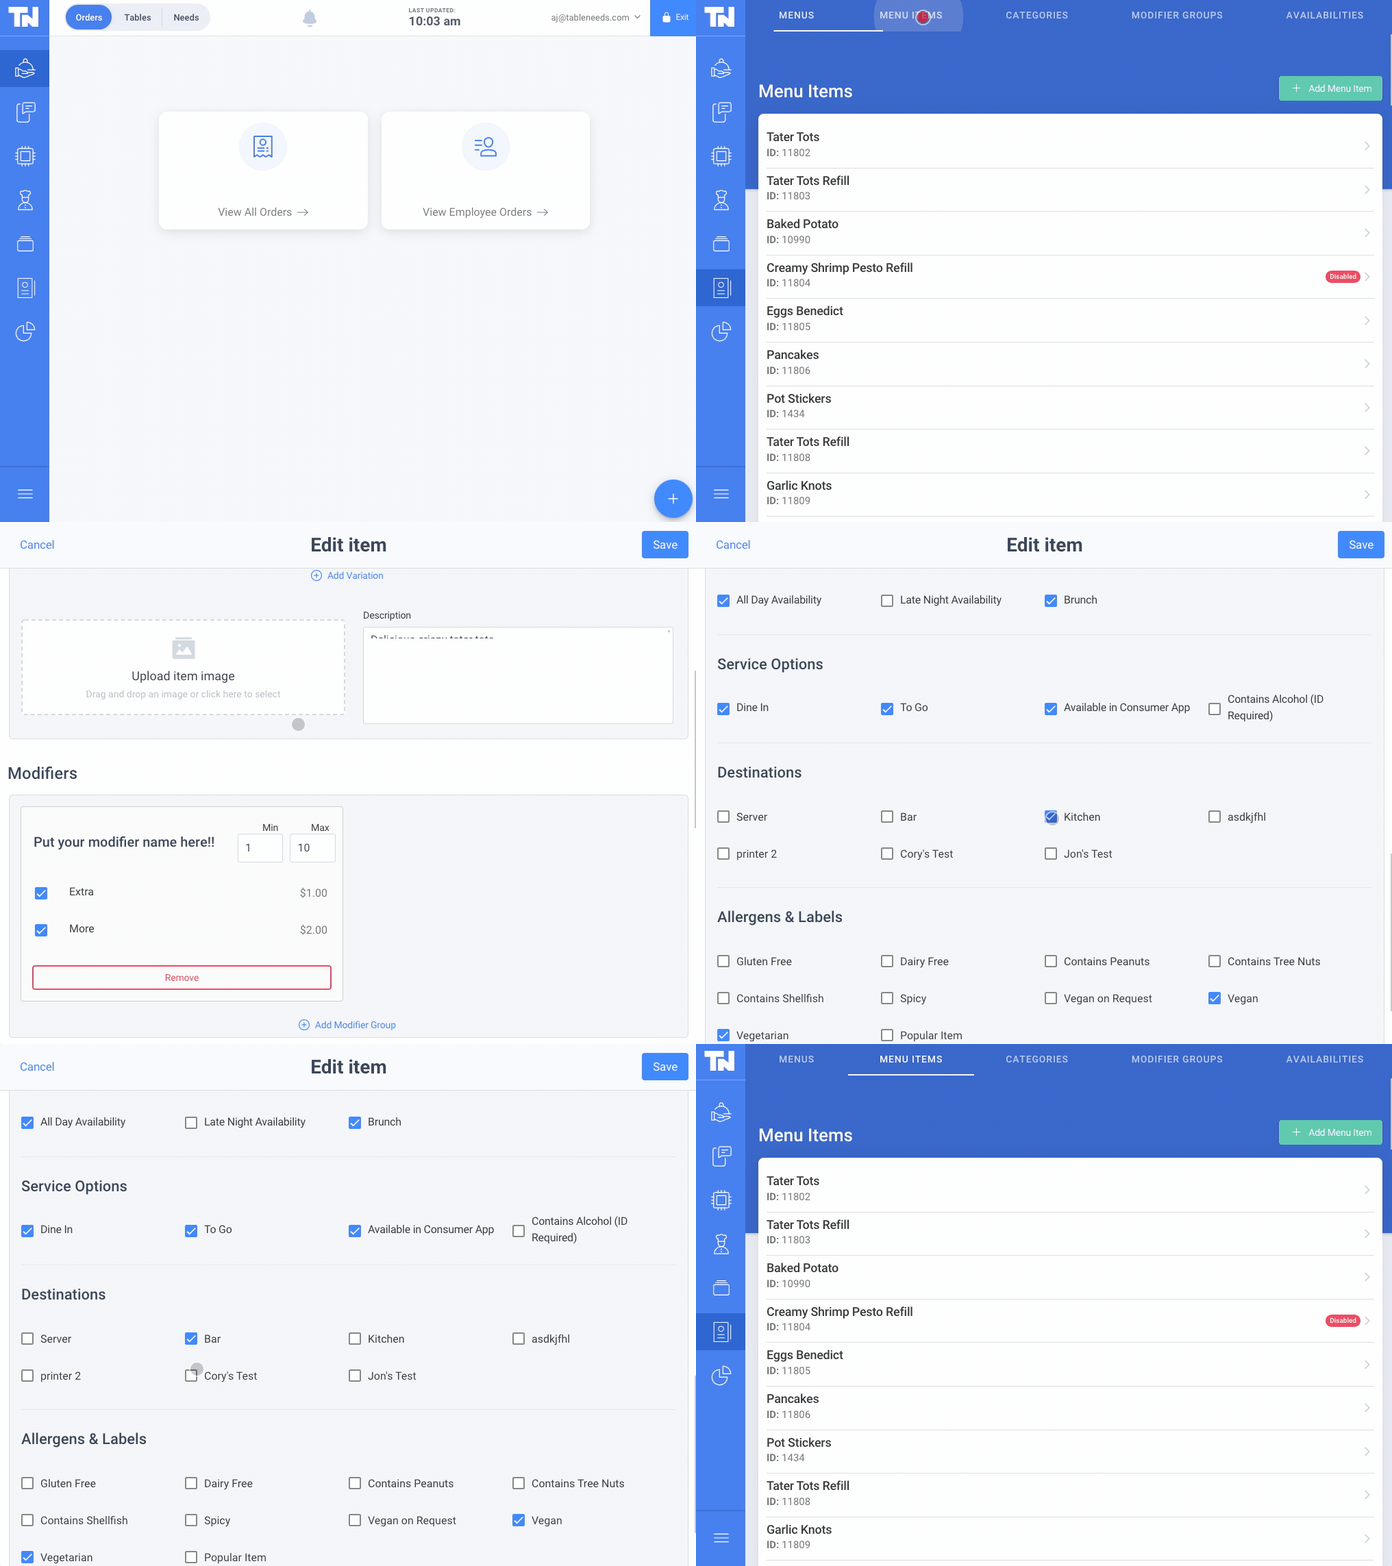
Navigate to the "Menu Admin" section, by clicking the "Menu Icon" that's located on the left side of the screen.
-
Click on the "Menu Items" tab, located at the top of the screen.
-
From here, find and click on the Menu Item that you are setting the destination for.
-
A new "pop-up" will appear, that allows you to edit that item's settings. Scroll down to the "Menu Details" section and find the "Destinations" option.
-
From here, simply click on the destinations that you would like to have this item displayed or printed when submitted on an order! You can add as many destinations as you like.
-
Then click the blue "Save" button at the top of the screen!
Don't forget to "Publish Your Menu" to see your changes go live in the system!
.

