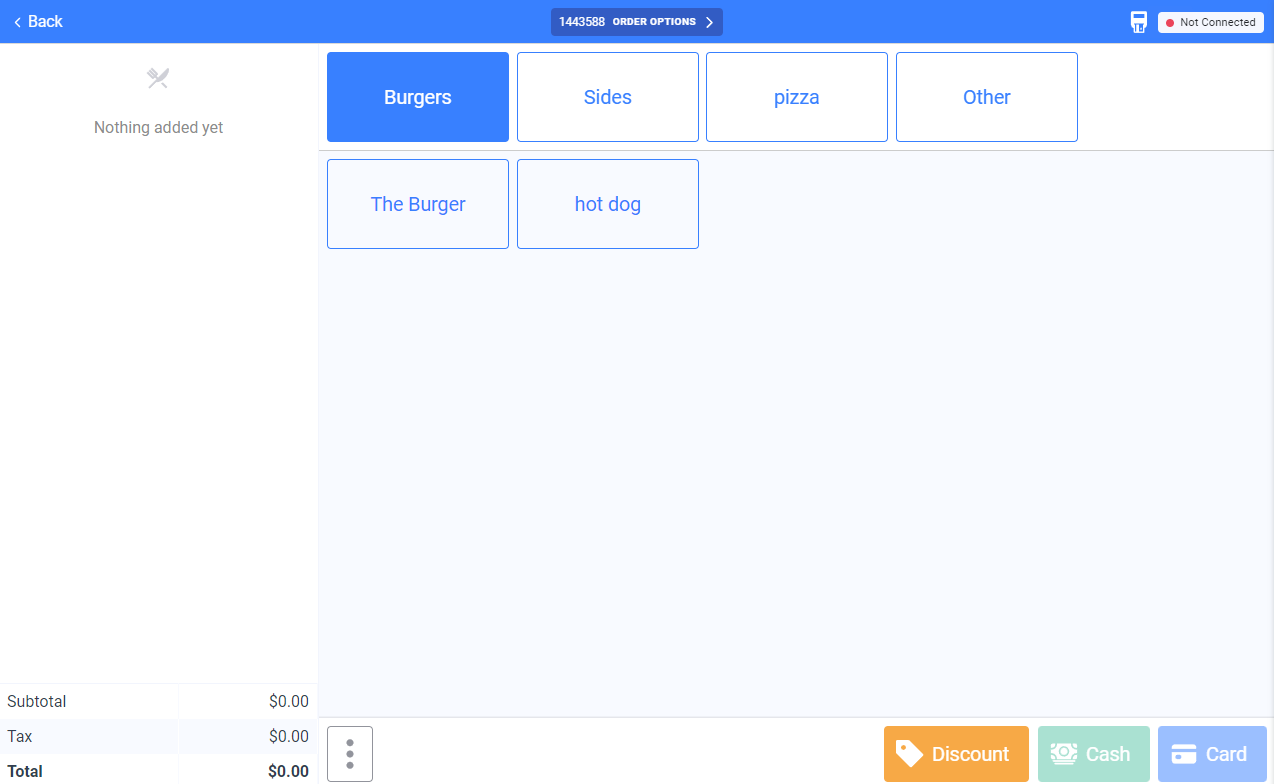
First, we will start on the Order tab of the point of sale. To begin the general flow of an order, we will select the “Plus” in the bottom right.
We will be on the order page once we select this button. From here we can select categories at the top and place menu items on the order with the buttons below those.
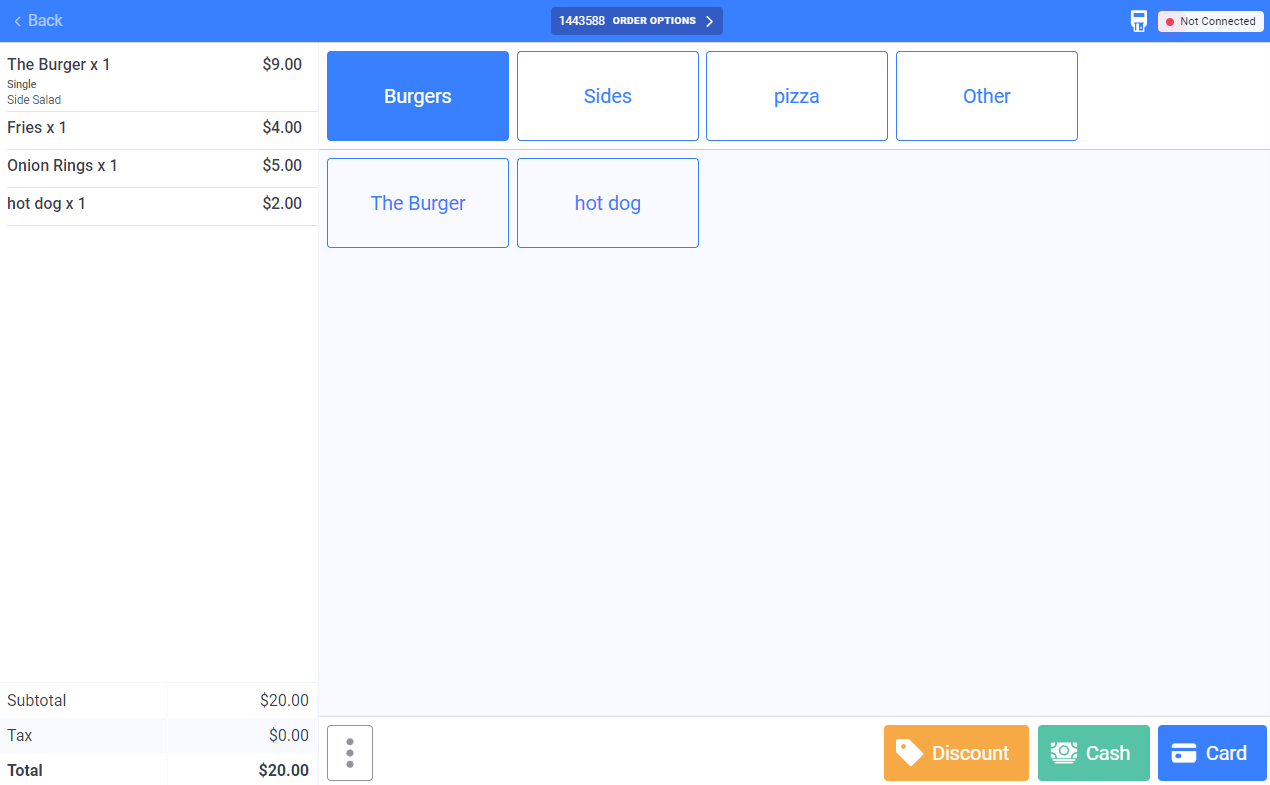
Once we select the items we want for our order, we can see that there are now menu items on the order. Having items on the order, we can see the “Cash” and “Card” buttons are now active on the point of sale page.
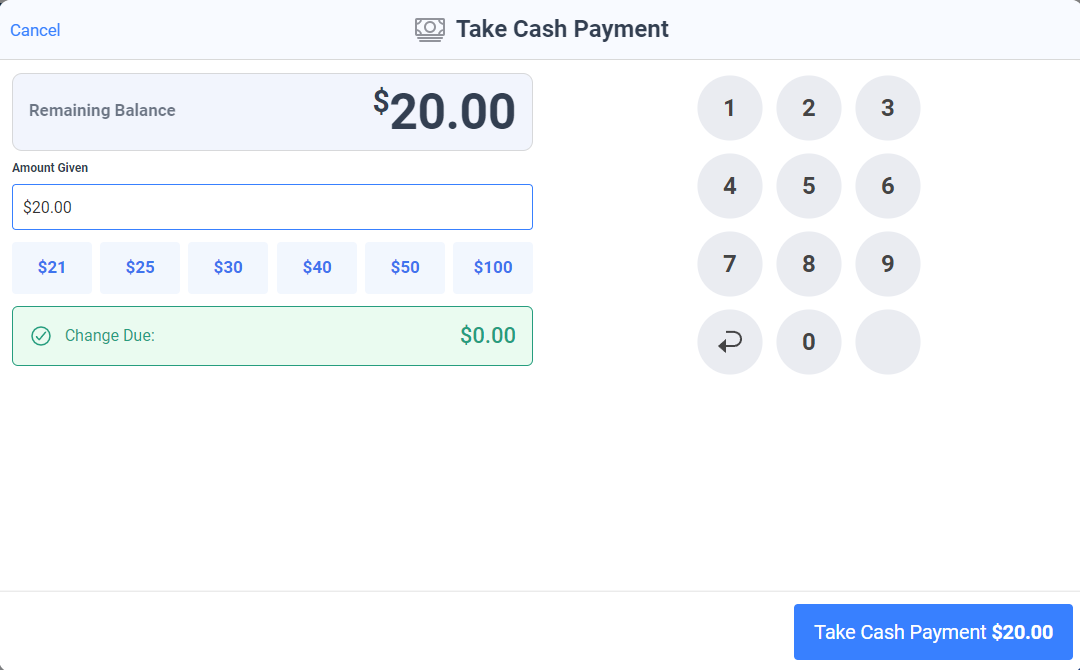
CASH
Selecting the cash button brings us to this pop-up. We can see a few ways to pay for this transaction. We can either select “Take Cash Payment” to pay out the entire amount, we can use the numpad to enter in a custom amount, or we can use the preset amounts under the “Amount Given” bar. Selecting one of these will bring us to the receipt page.
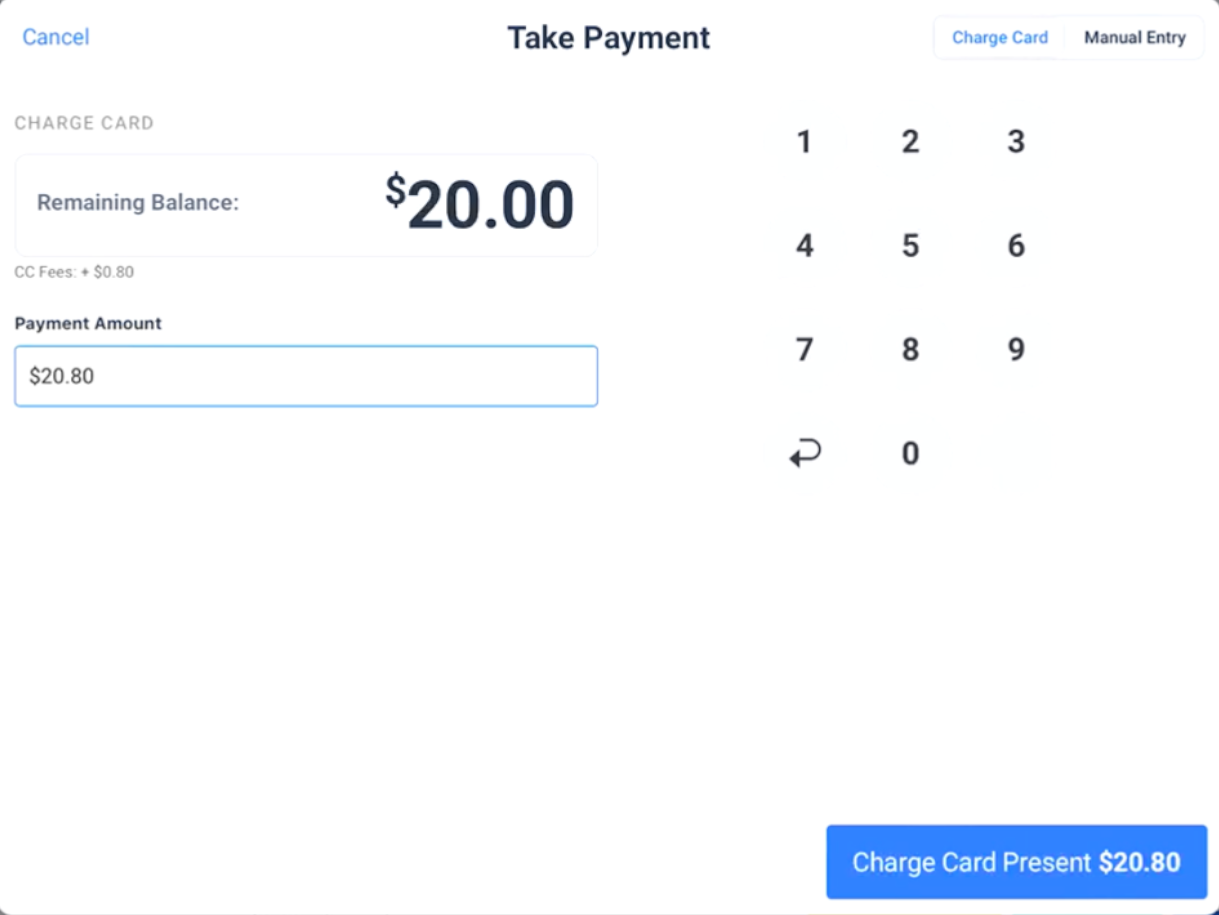
CARD
Selecting the card button brings us to this pop-up. We can see the toggle at the top right shows either Charge Card or Manual Entry. Hitting “Charge Card Present” will prompt the connected credit card device for payment.
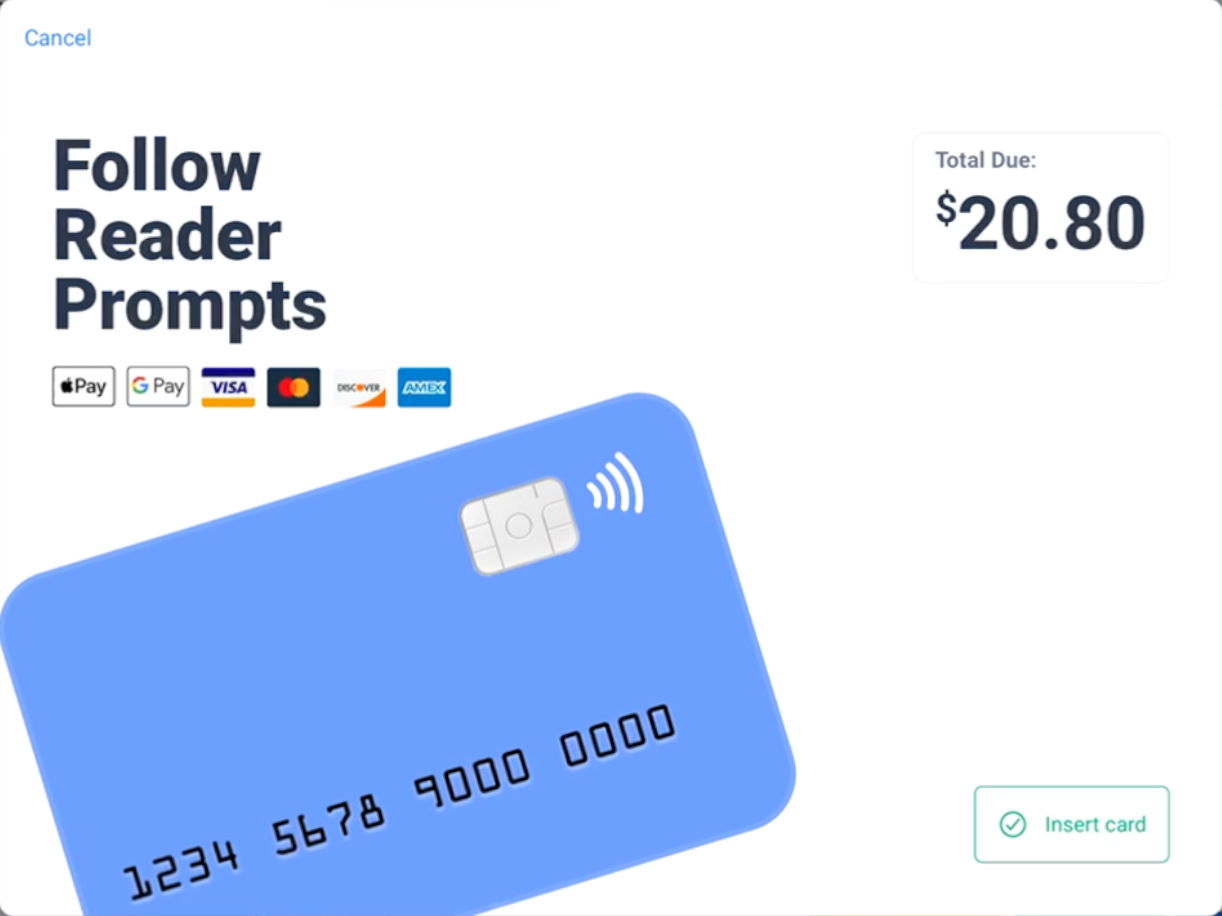
Once on this page, it will prompt on the connected credit card device. After this, it will bring us to the receipt page.
From here we can either select a Digital Receipt, a physical printed receipt, or no receipt if they do not wish to have a receipt.

.
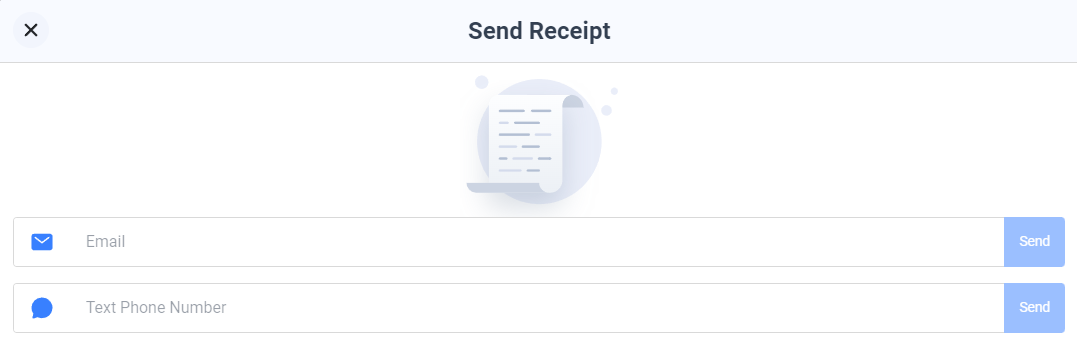
Digital Receipt
If we select the digital receipt, it will show us the options for email or text phone number. Both of these will show an appropriate keyboard on an iPad. After you hit “Send” it will finish the receipt and send it to them by their preferred method.
Physical Receipt
We can either print off the default printer or we can select the three dots to the right. If we select the three dots to the right, we can select a different printer to print from. If we just print the default printer by selecting “Print Receipt”, it will finish the order.
If we select the three dots, we can see how to select a different printer to print the receipt from. Here we can select a different printer that either is or is not the default printer and finish the check be selecting either “Print Receipt” or “No Receipt” if they change their mind.
