![Table Needs.png]](https://help.tableneeds.com/hs-fs/hubfs/Table%20Needs.png?height=40&name=Table%20Needs.png)
How Menu Management Is Organized
Menu Management has seven tabs. Each one controls a different part of how your menu looks and works:
|
Tab |
What It Does |
|
Menus |
Create and manage your menus |
|
Categories |
Group items (Drinks, Sandwiches, etc.) |
|
Menu Items |
Build each item customers can order |
|
Modifiers |
Add customizations (Add Cheese, No Onions) |
|
Availability |
Control when items appear |
|
Destinations |
Route items to the right station |
|
Labels |
Tag items (Gluten-Free, Spicy, etc.) |
|
Taxes |
Manage tax rates and organize tax configuration groups |
|
Import |
Create a menu with our built in AI tool |
Work through them in this order the first time you set up your menu. After that, jump to whichever tab you need.
1. Menus
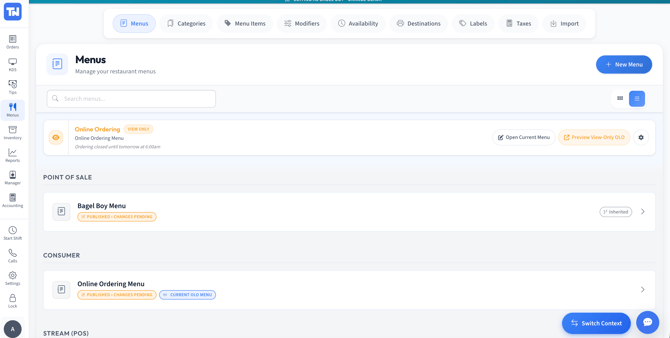
What it's for: Creating and organizing your menus: your main menu, a seasonal menu, a Happy Hour menu, or a special event menu.
What you can do here:
- Create a new menu
- Rename or reorder existing menus
- Assign categories to each menu
- Set a menu as active or inactive
When to use it: Anytime you need to add a new menu or change how your items are organized for customers.
2. Categories
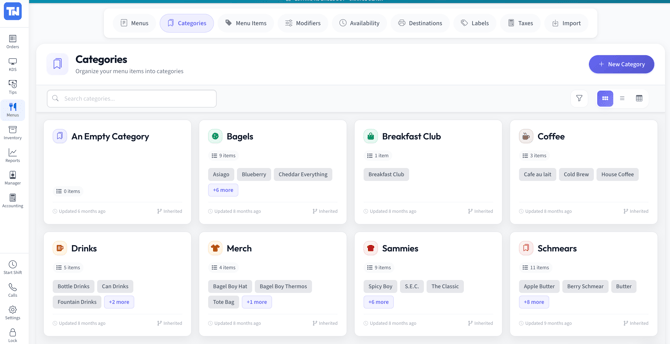
What it's for: Grouping your menu items so they're easy to find for your staff and your customers. Examples: Appetizers, Salads, Drinks, Sandwiches, Breakfast
What you can do here:
- Add a category name and description
- Choose a layout and color (optional)
- Add an icon or emoji (optional)
- Assign menu items to the category
- Link the category to one or more menus
How to set it up: Follow the prompts on the page. At the bottom, you'll see two association sections: one for Menu Items and one for Menus. Drag items into the category from there.
3. Menu Items
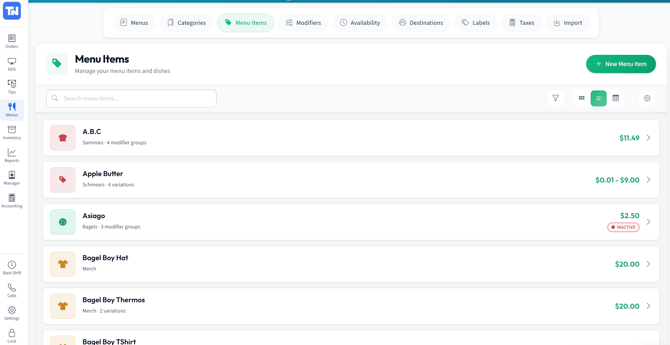
What it's for: Building every item that appears on your menu.
What you'll fill in:
- Item name
- Price
- Description
- Variations (size, format, etc.) with individual pricing
- Inventory and tracking settings
- Display settings to make the item visible
At the bottom of each item page, you can also set:
- Availability — limit when this item appears
- Destinations — control where it prints or shows on the KDS
- Labels — tag it (Gluten-Free, Spicy, etc.)
- Taxes — assign the right tax rules
When you're done: Hit Save and Publish to make your changes live.
4. Modifiers
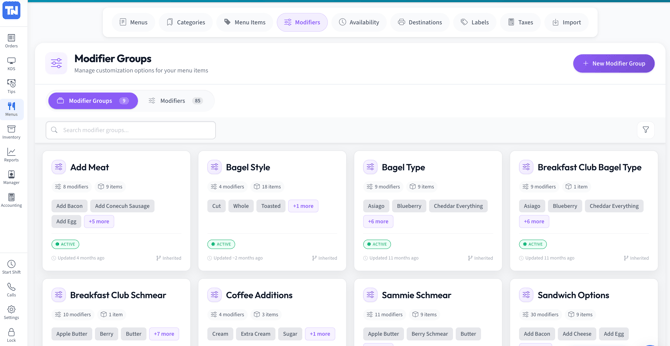
What it's for: Letting customers customize their order — and making sure your kitchen gets the right instructions every time. Examples: Add Cheese, No Onions, Choose Your Side, Extra Shot
What you can do here:
- Create modifier groups
- Set minimum and maximum selections
- Allow or restrict multiple selections
- Add pricing to individual modifiers
- Assign modifier groups to specific menu items
How to create one: Click New Modifier Group in the top right. Name the group, set your min/max rules, then use the associations section to apply it to the right menu items.
5. Availability
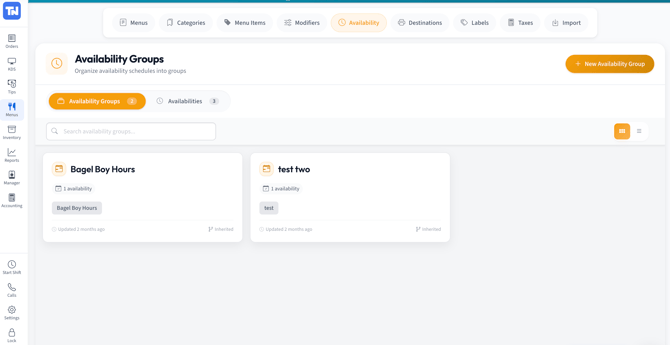
What it's for: Controlling when certain items show up on your menu. Great for breakfast-only items, Happy Hour specials, or limited-time offerings.
What you can do here:
- Set time-based rules (days and hours)
- Apply rules to a whole menu, a category, or a single item
How to set it up: Click the button in the top right to create a new availability group. Add a name and description, then use the associations section to connect it to the right items or menus.
6. Destinations
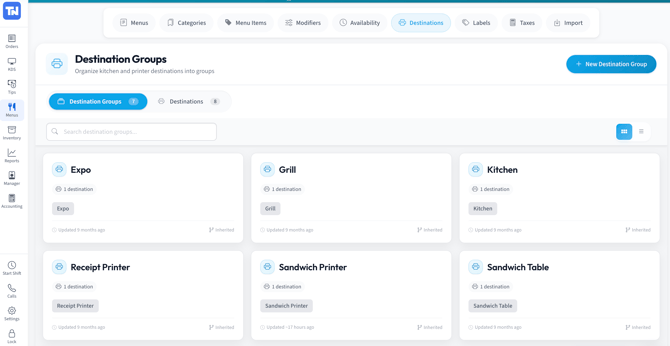
What it's for: Telling the system where each item goes when it's ordered: Kitchen, Bar, Dessert Station, etc.
When you will use it: If our support team asks you to check this tab during printer or KDS troubleshooting, this is where you'll go.
7. Labels
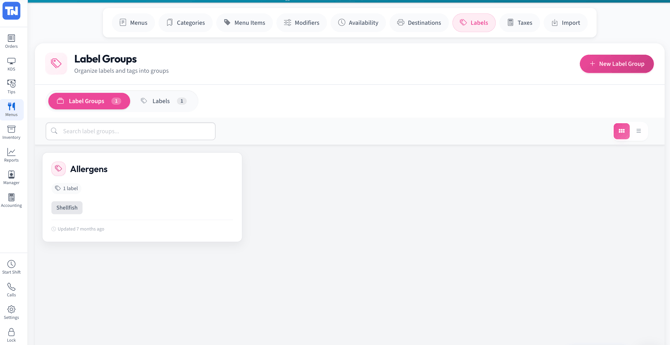
What it's for: Tagging items so your staff and customers have the information they need.
Common examples: Gluten-Free, Spicy, Contains Nuts, Vegan, Allergen
What you can do here:
- Create custom label groups
- Choose colors or icons for each label
- Assign labels to menu items
How to create one: Click the button in the top right. Add a group name and description, then use the associations section to apply labels to the appropriate items.
8. Taxes
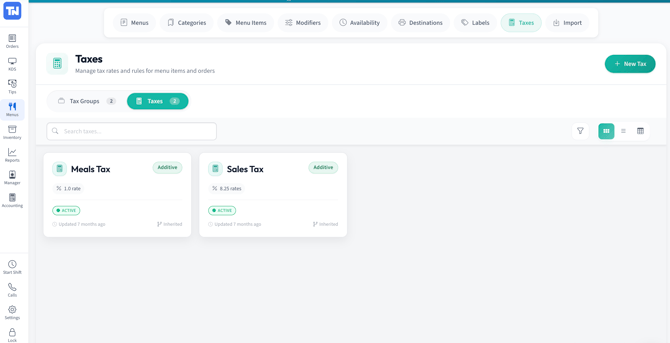
What it's for: Manage tax rates and rules, as well as organizing tax configurations into groups.
What you can do here:
-
Create New Tax — name, rate, tax type, associations, and toggle on/off
- Edit Taxes — name, rate, tax type, associations, and toggle on/off
- Create New Tax Group — name, description, and associations
- Edit Tax Groups — name, description, and associations
9. Import
What it's for: Build your menu with AI
How it works: First, get the AI guide to create json file. Then, upload your menu json file to build a draft menu right in the Table Needs POS System.
Quick Reference: Where to Go for Common Tasks
|
I want to… |
Go to… |
|
Add a new menu |
Menus |
|
Create item groups (Drinks, Mains) |
Categories |
|
Add or edit a menu item |
Menu Items |
|
Add "Add Cheese" or other options |
Modifiers |
|
Limit an item to breakfast hours |
Availability |
|
Fix a printer or KDS routing issue |
Destinations |
|
Tag an item as Gluten-Free |
Labels |
|
Adjust Taxes |
Taxes |
Need help? Call, text, or email our support team — real people, available 24/7.