How to Submit Orders and Take Payments!
The last step in taking a guest's order! Payment and submitting. This article walks through submitting an order, taking payment, processing refunds, and more!
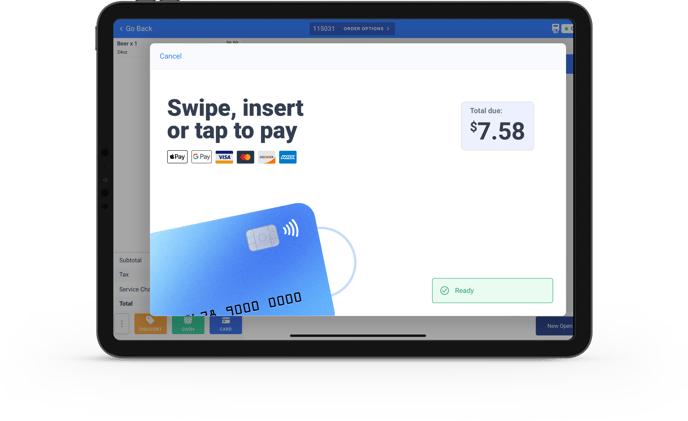
Table of Contents
Submitting Orders & Taking Payment
When using our Quick Service Point of Sale, orders are officially submitted when payment has been taken. Once a successful payment is processed, the order's status will change formally throughout the system and will be sent to a KDS or printer if used.
Once all items have been added to an order, and you are ready to submit and take payment. Click on the "Cash" or "Card" option located at the bottom left of the screen.
Cash Payments
When clicking on the "Cash" option, The following payment window will appear on the screen. This window will allow you to input the cash a guest has given you and automatically tell you the amount of change due.
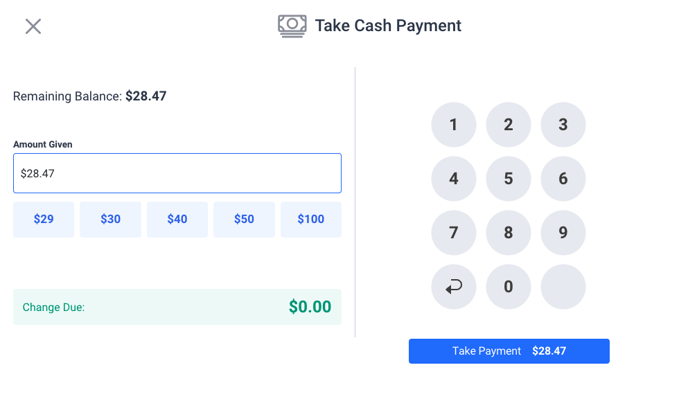
You are given some pre-set options for the amount of cash that a guest might have given you. If they have not given you one of these amounts, you can input the exact amount of cash by using the keypad on the right. Once you have input the "Amount Given," the "Change Due" field will populate.
Next, click the blue "Take Payment" button. The following "Payment Successful" screen will appear. This screen gives you a few options on what to do next.
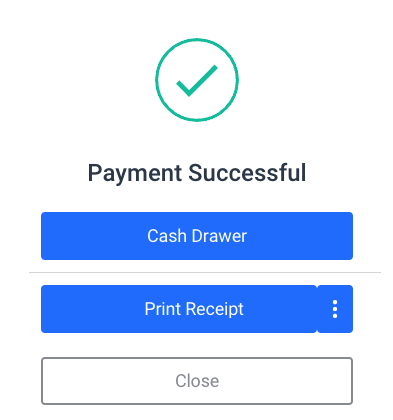
If you have a Cash Drawer hooked up to your printer and would like to open it. Click on the "Cash Drawer" button.
If your guest wants a receipt, click on the "Print Receipt" button. A receipt will automatically begin printing at your Default Receipt Printer. Clicking on the three "Dots" to the right of "Print Receipt" will give you the option to select a different printer.
Card Payments
When clicking on the "Card" option, The following payment window will appear. Like taking a cash payment, this screen shows you the "Remaining Balance" and gives you some options for taking payment. Just below that, you will see the Credit Card fees associated with processing a card.
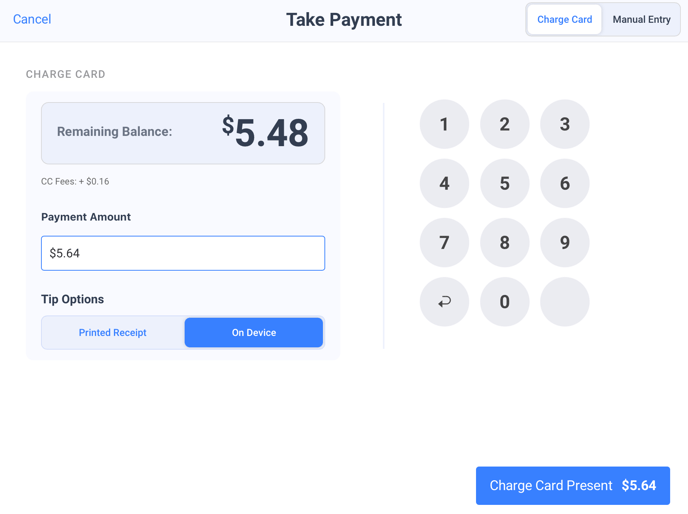
At the top right of this screen, you will see options for "Charge Card" and "Manual Entry." "Charge Card" allows you to swipe or insert your guest's physical card, while Manual Entry will allow you to type in their credit card number.
Depending upon the type of card reader that you are using. You will see one of two different prompts when selecting "Charge Card Present."
Bluetooth Readers
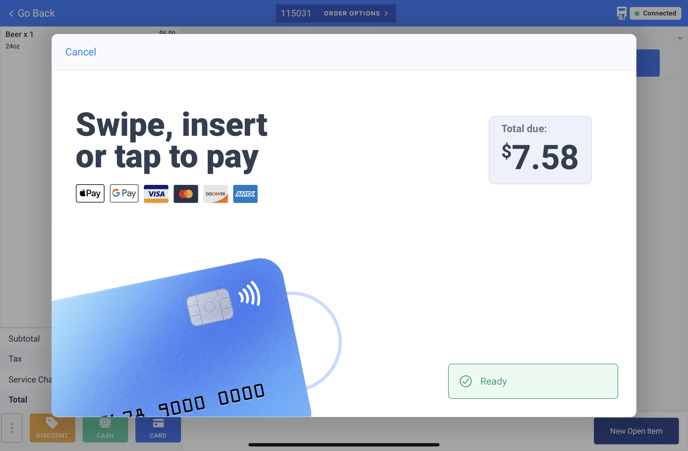
If you use one of our Bluetooth card readers attached to your Point of Sale, you will see the following screen when selecting "Charge Card Present."
Follow the instructions on the screen, and have your guest insert, swipe, or tap to pay.
Wifi Readers
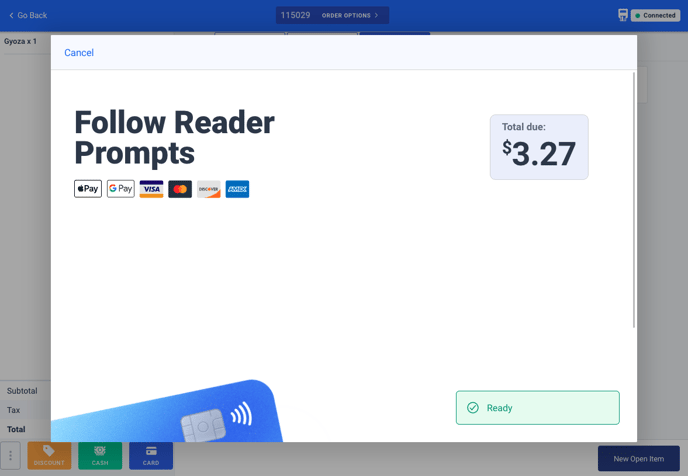
If you use one of our handheld Wifi card readers, you will see the following screen when clicking "Charge Card Present."
You will be directed to follow the prompts displayed on the reader's screen. This will display the subtotal to your guest and offer them some pre-set tip options. They will have the option to swipe, insert, or tap their card to pay.
Regardless of which card reader you are using, once your guest has swiped, inserted, or tapped their card, you will see the loading screen shown in the GIF below!
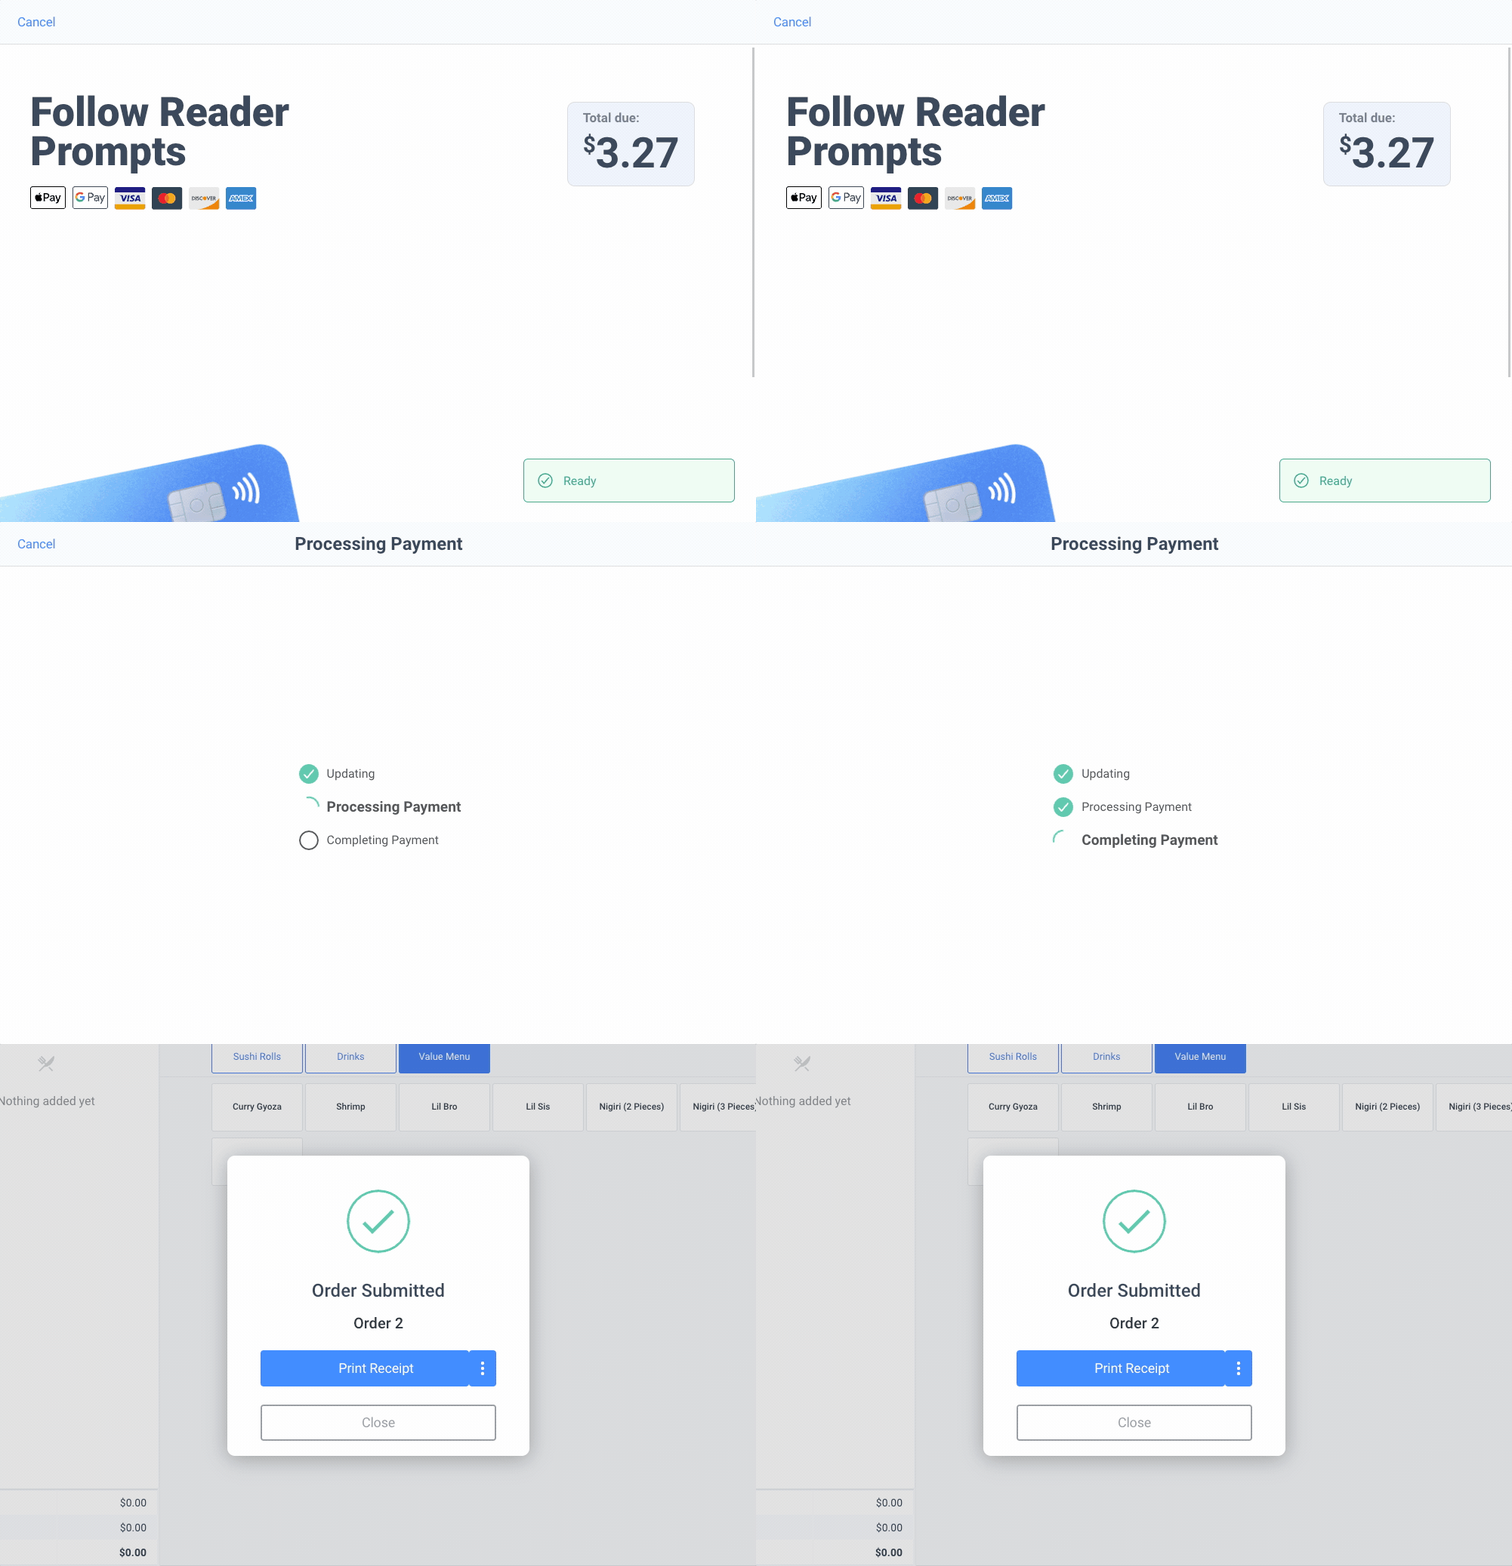
Once payment is complete, you will get an "Order Submitted" notification and the option to print a receipt!
Applying Discounts
There are two options for applying discounts to your guest's order. You can apply the discount on a per-item basis. Or you can apply the discount for the entire order. Let's take a look at each of these.
Discounts by Item
To apply a discount to a specific item, click on the desired item that has already been added to the order on the left side of the page. When doing so, you will see options for this item appear on the main portion of the screen. Down at the bottom, a "More Options" button will now be available. When clicking that button, you will be presented with discount options to apply!
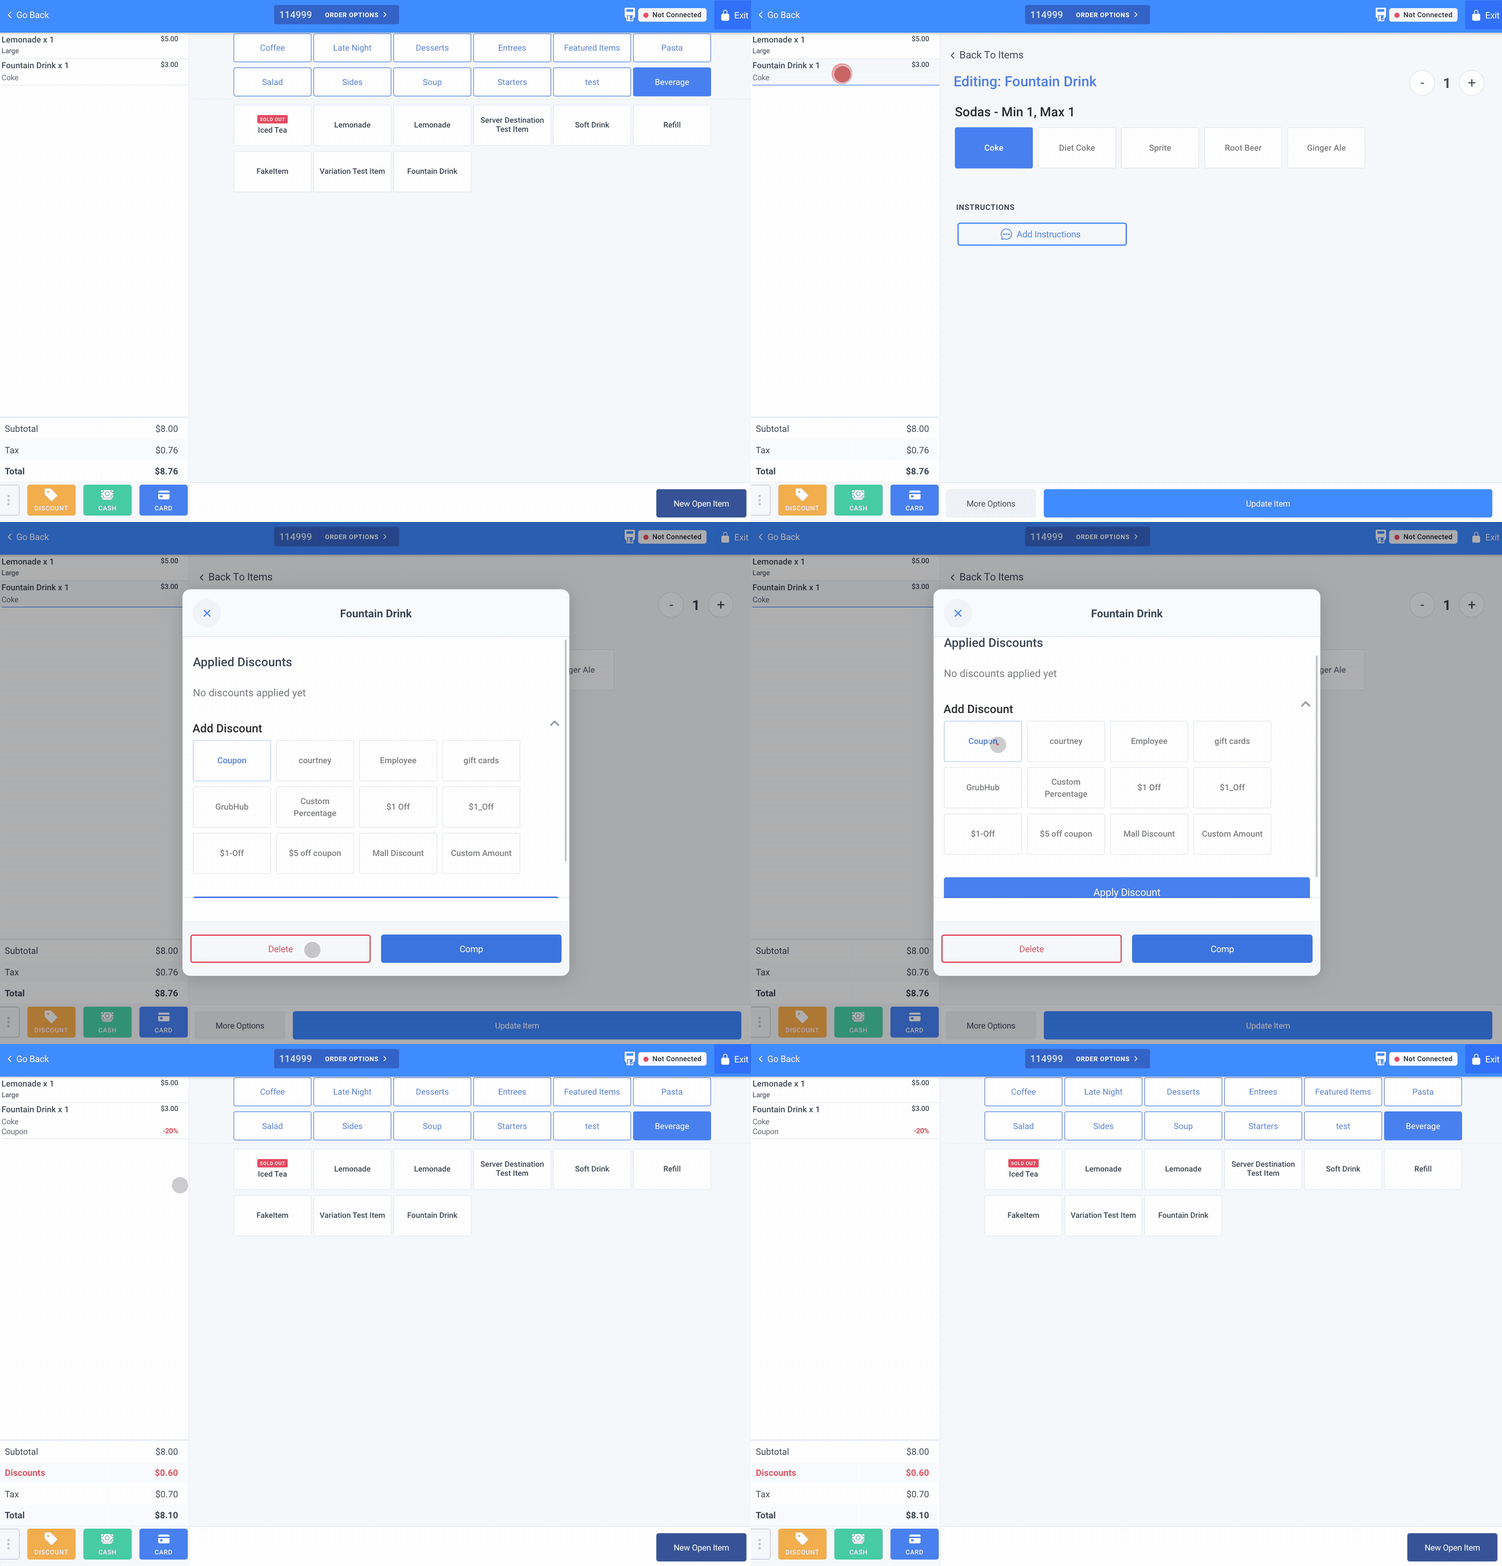
(Note: When clicking the "More Options" button, you are also given the option to "Comp" the item.)
Discounting Whole Orders
To apply a discount to an entire order, click on the orange "Discount" button located at the bottom left corner of the screen. You will see the same discount options as when applying per item. Select a discount option and click the apply button. You can now see the discount has been applied to the entire subtotal.
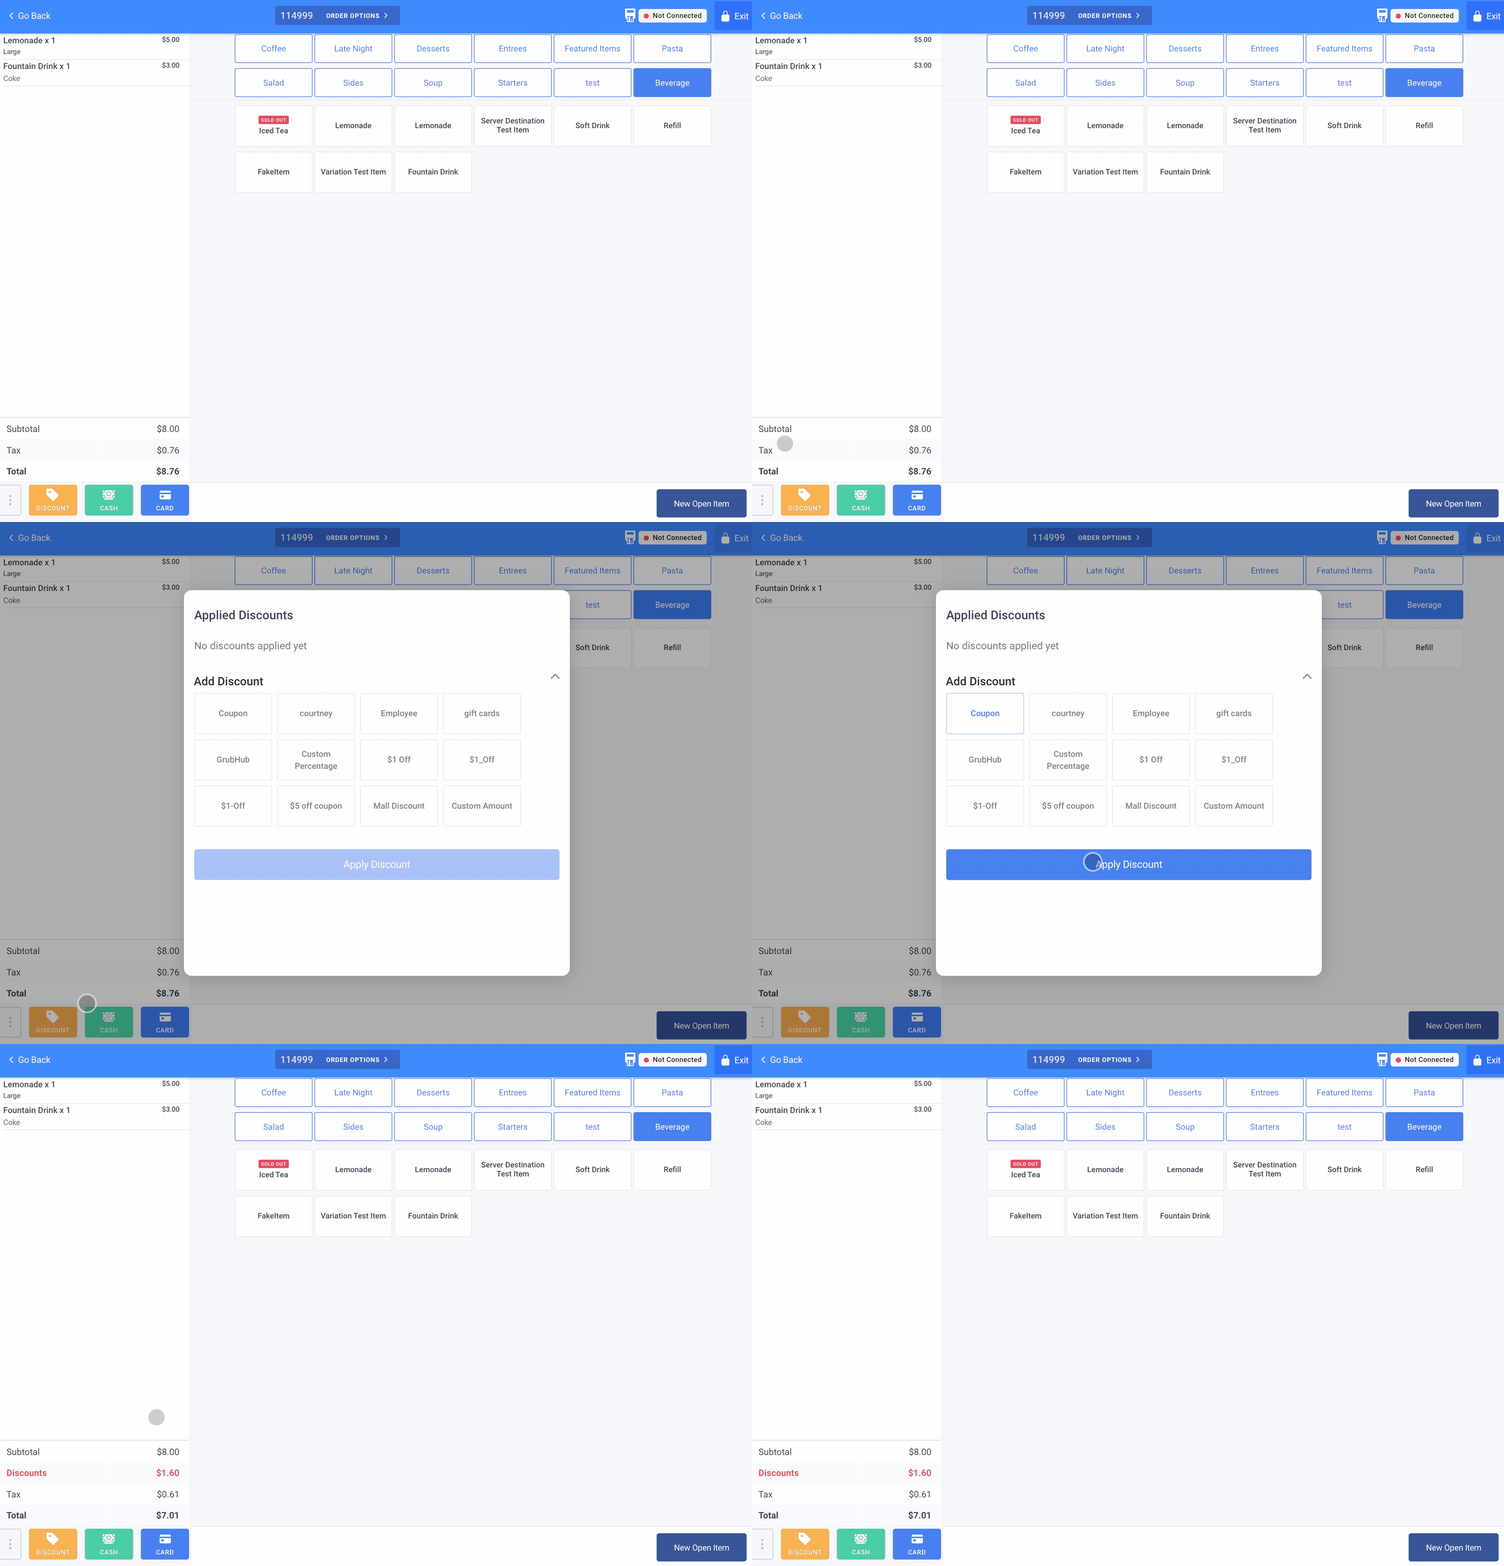
When applying discounts, you have the option to enter a "Custom Amount". Clicking this option will allow you to enter a specific dollar amount or percentage.
To set up, or change your preset discount options, please reach out to our Support or Restaurant Success teams!
Submit Without Payment
We know that no two orders or guests are going to be the same, and you might find yourself in a situation where you need to submit an order without taking payment first. We have made this easy to do!
To submit an order without taking payment, click on the three "Dots" located at the bottom left of the screen. A pop-up will appear with a few different order options. Click on "Send Without Paying".
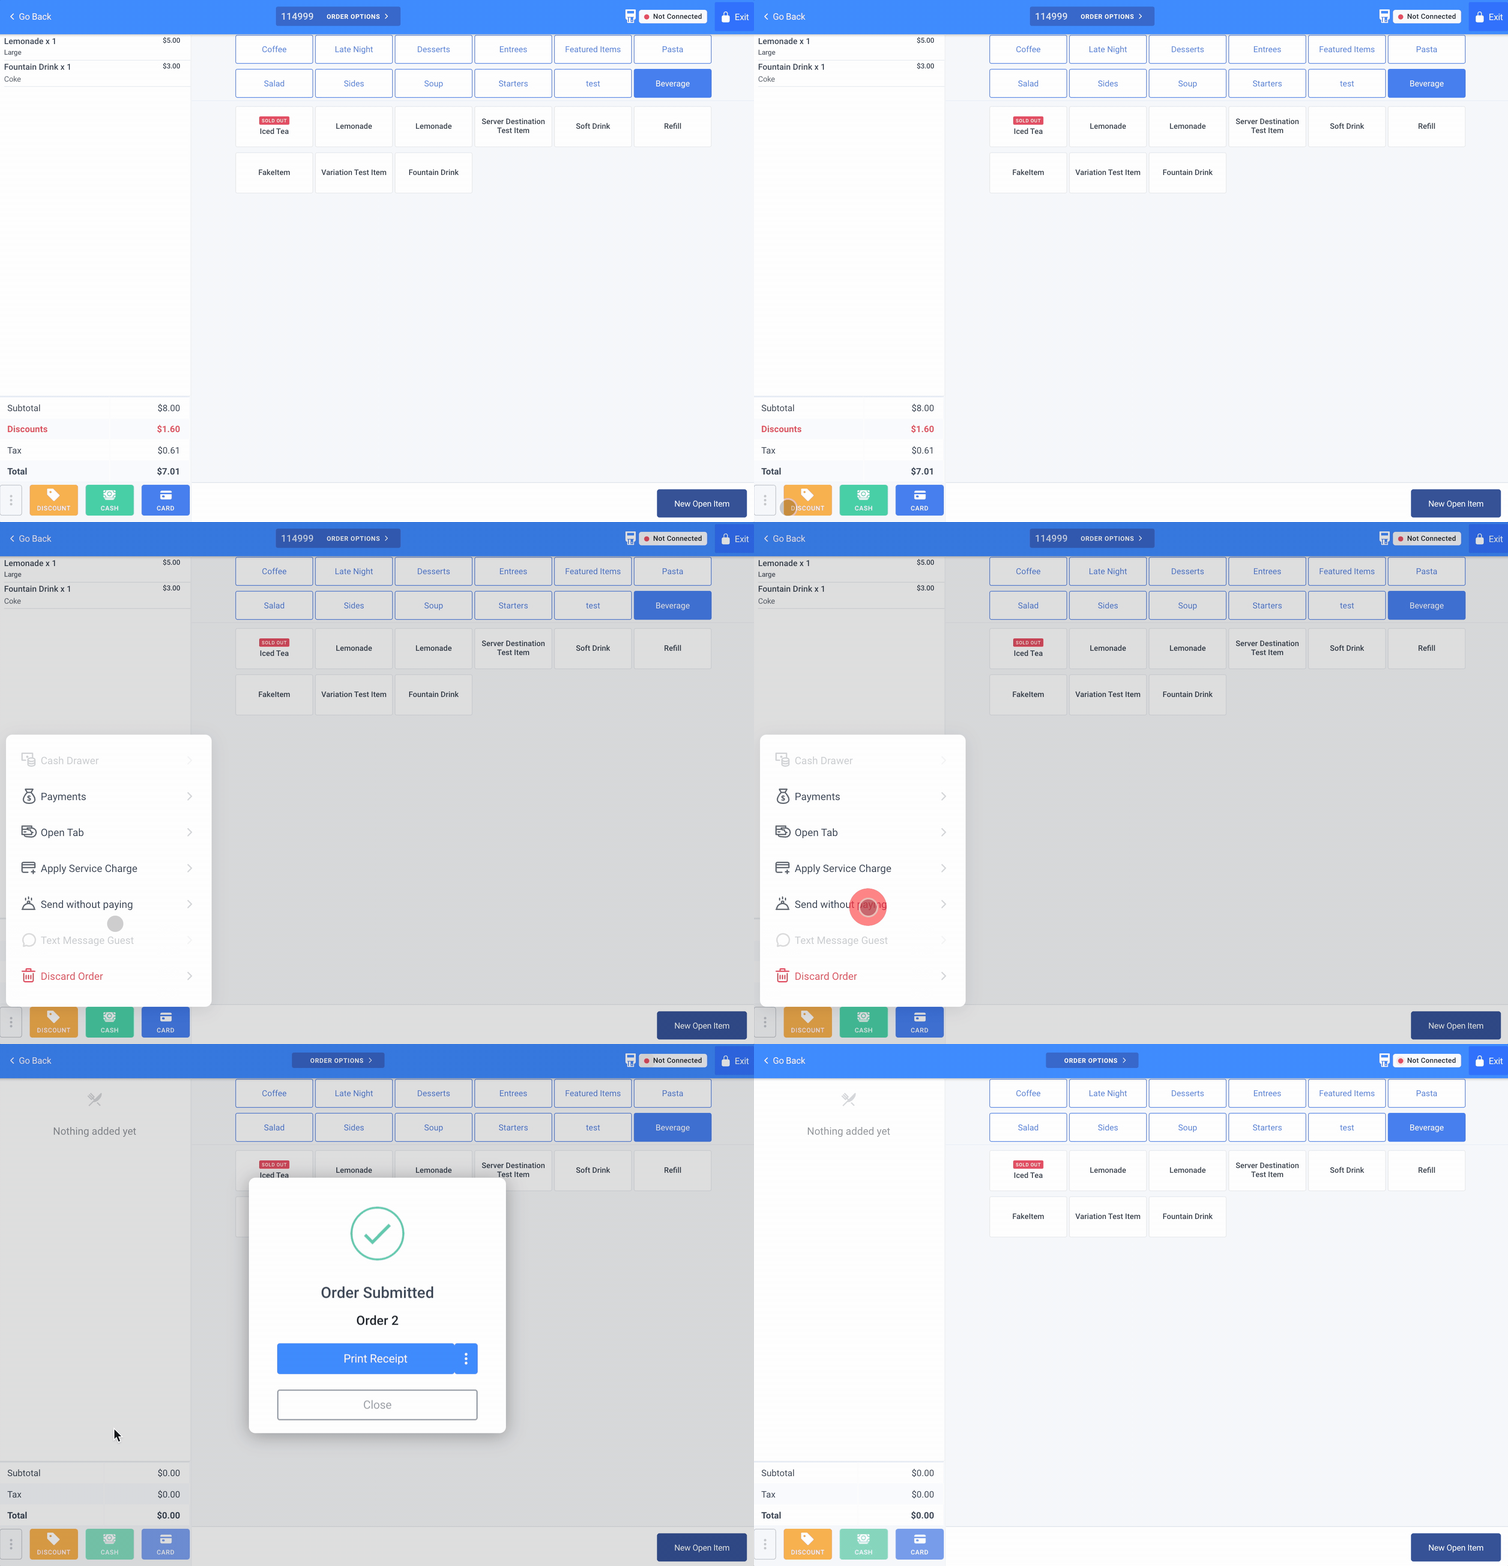
This option comes in handy particularly if you need to prepare and make an order prior to a guest arriving or taking payment. You can take payment on this order later, by finding and clicking on the order on the "Orders & Requests" page.
You now know how to take payments and submit orders. But occasionally you might need to issue a refund. Learn how by checking out our guide here!
